You are correct, and the streamers are right, the Tibia Wiki description is a bit misleading on this point, it is not just any random melee monster that triggers the position swap.
Only one specific creature per hunting ground (alongside the Bloodjaws) can trigger the position swap mechanic.
This mechanic's design is inherited directly from Soul War. In Soul War, the swap mechanic was coded specifically for single key creatures in each area (for example, Branchy Crawlers in the Rotten Wasteland or The Many Faces in Claustrophobic Inferno). When CipSoft developed Rotten Blood, they reused this underlying mechanics code rather than writing a completely new system from scratch.
Here is the breakdown of the specific creatures that trigger the swap in each Rotten Blood area:
Darklight Core: Walking Pillar
Gloom Pillars: Wandering Pillar
Jaded Roots: Bloated Man-Maggot
Putrefactory: Rotten Man-Maggot
All Areas: Bloodjaw
How the Swap Works in Practice & How to Avoid It
The swap has a distance range limit and visual clues when it triggers:
The Clues: When a swap is triggered, both you and the creature will display a death blob animation

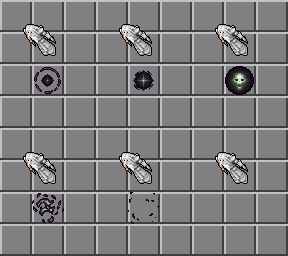 , and the creature will often yell "SWAAAAAAAPP" in orange text.
Dodging the Swap: If you see the animation start, move outside of its range before the animation finishes. The creature will still complete its swap animation, but because you moved out of range, you will not actually be displaced.